Showing posts with label Before and After. Show all posts

21 February 2013

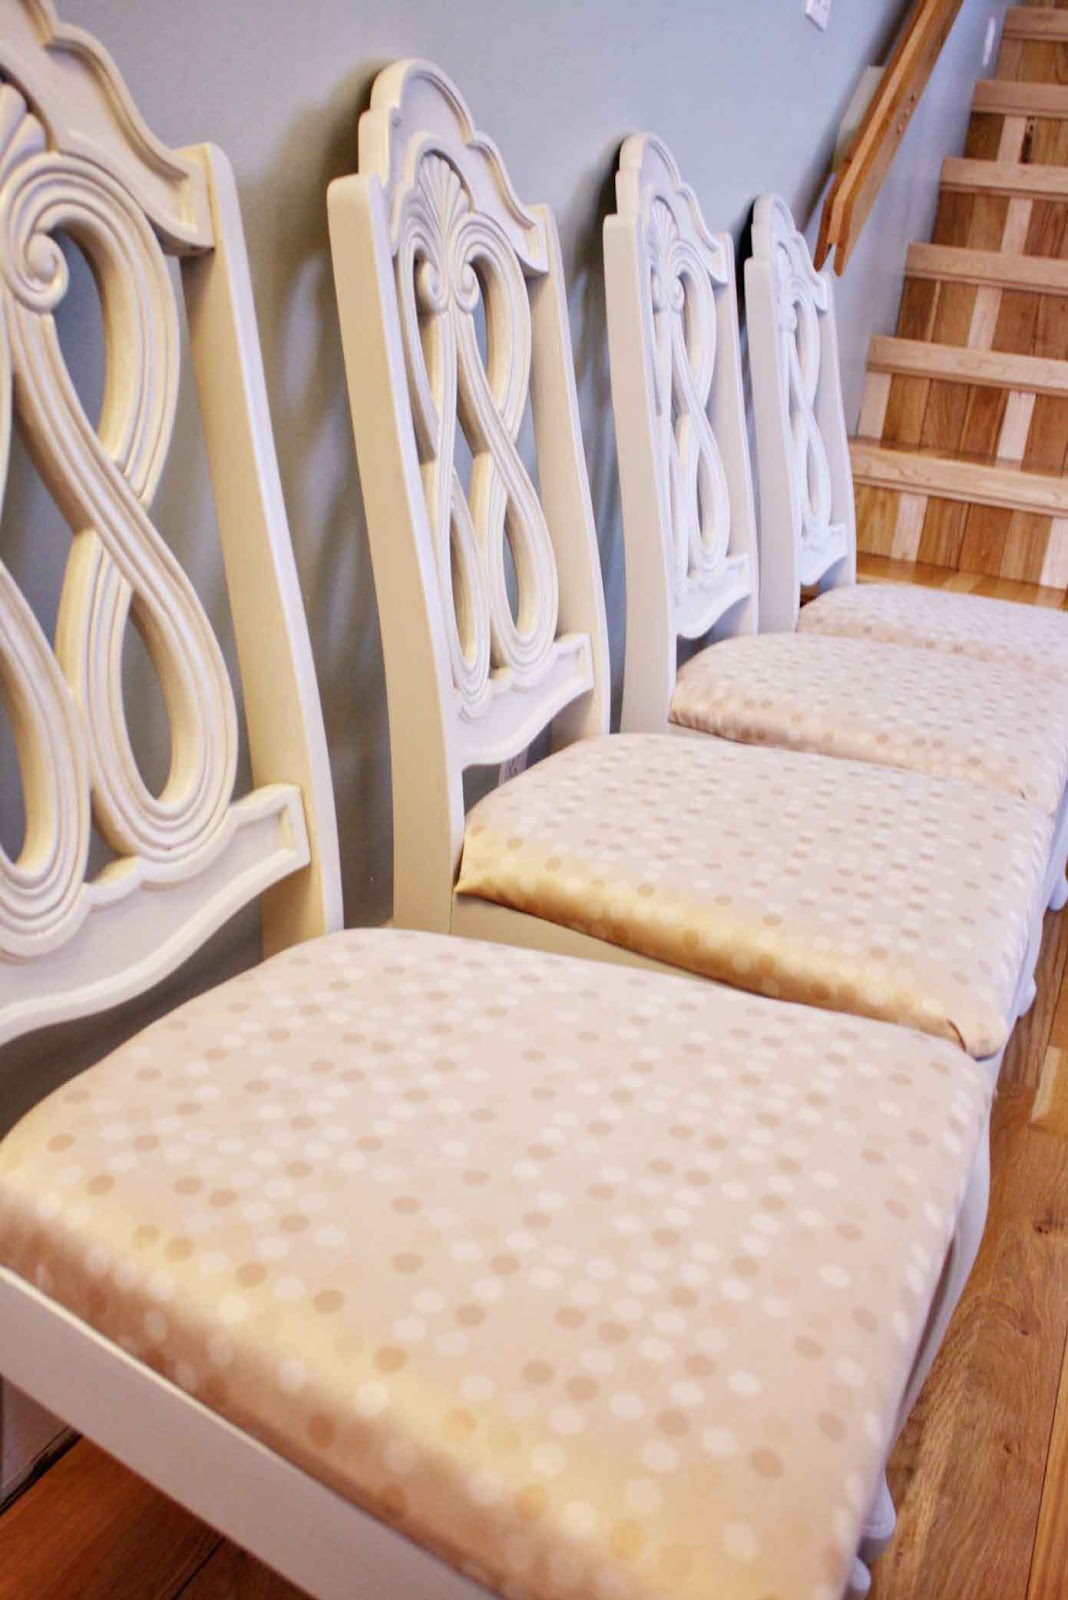
Before & After: Modern Grey Dining Set

While I may only be dabbling in my furniture painting lately, my hubby seems to have fully jumped onboard. He recently completed this gorgeous dining set, restored from a nasty garage sale find. I'm bummed I didn't take any before photos - he started the project on the sly - but rest assured they were an ugly honey wood frame with stained mustard velvet seats. Ew! 

After some elbow grease, lots of sanding, priming, painting, finishing and re-uphostering - ta da....a fresh and chic dining set that would go with many different decor schemes.

The frames are painted a soft dove grey and the seats are covered in a creamy neutral fabric with a touch of whimsy - polka dots! Here are some pics and if you live in Winnipeg and are interested in purchasing them, they're listed for sale on Kijiji here!


Hope you're all having an amazing week!


14 February 2013

Before & After: Rustic Live Love Side Tables

Hi everyone! Long time no blog...I'm enjoying the slow start to 2013, with lots of lazy nights at home, refreshing yoga classes and cooking comfort food to fight off the frigid winter we've been having. How about you?

So I'm very exciting to share a furniture makeover with you - my first one since around wedding time over a year ago! This was a great project to dive back into because it's for someone super special. My amazing friend L is getting married and I knew I wanted to donate furniture for her wedding social. Well, tomorrow is the big day of the social and here's what I did!


I had a set of two simple side tables in storage for a very long time and they were perfect for this project. I gave them a good sanding, primed them and painted them in an allover pale white/grey. Then I trimmed off a border and added a pop of colour with a vibrant turquoise. But it need a little something extra...so I added a little messaging to really make them unique and mirror the new start with L & I's upcoming marriage. A bit of distressing for that rustic look plus a few coats of finish and...voila! I introduce to you the Rustic Live Love Side Tables. I hope they find a fabulous new home tomorrow!


Have a fabulous week everyone!


17 October 2011

Before and After: Espresso with Cream Dining Chairs

Hey everyone! As promised, I have a Lather Creations furniture reveal. The twist is that I had a guest upcycler for this project....my husband Jack!

Jack has his own hardwood flooring company so he's a total wood guy - loves working with it and loves the rich visual appeal and warmth it adds to a room. He's been wanting to get involved for some time and was just waiting for the right passion project to come along.  So when our friends were getting rid of their old dining room chairs - Jack snapped them up. The chairs needed some work, so Jack ended up taking them apart and reinforcing them, sanding them down to the bare solid red oak wood.


The chairs have regal spindle sides and a classic ladderback design. Being so fond of wood, it was hard for Jack to think about losing it completely. So he came up with a unique design that blends the bright modern feel of the Crisp Linen paint with richly Espresso stained wood sections. 

His work is absolutely meticulous and I love how they turned out! They would be equally suited around a clean white table, a more elegant black table or even a classic dark wood dining table - depending on your style. A huge thanks to Jack for bringing your impeccable style to Lather Creations - we have to think about more than just a marriage partnership.... :)

Here's some shots of the individual chairs...


And the complete set...


If you live in the Winnipeg area and are smitten with the set of Espresso with Cream Solid Oak Dining Chairs then click here. Or if have an old piece of wood furniture laying around that you'd like refreshed, email me at lhume1@mts.net and we can chat!

Have a lovely day friends!


18 August 2011

Before and After: Sunday School Cream Writing Desk

Yes, I do still paint furniture! It's been eons since I've posted a Before and After for Lather Creations, but I did accept one last commission before the wedding and she is now complete. Vanessa contacted me about working on this gorgeous solid wood writing desk she had been holding on to...and wanted refreshed with a new look. How sweet are those spindle legs?


The top of the desk was pretty beat up so after some heavy duty sanding and wood filler, I primed and painted the piece in CIL's Crisp Linen - a slightly yellowish white that looks perfectly antiqued. Some distressing around the edges and few coats of water-based finish completed the process. Vanessa chose a chic antique-looking Anthropologie knob from my collection for a little pop of sophisticated colour. The desk made me think of penning hand-written letters on the weekend to loved ones...isn't she pretty?


Hope she enjoys her new look in Vanessa's home office - thanks for letting me work on your special piece!
If you have an old piece of vintage or antique wood furniture in need of a fresh new Lather Creations look, get in touch. I won't be taking on new projects until September but we can definitely chat...email me at lhume1@mts.net.

Have a lovely day friends!


26 July 2011

Before and After: Vintage Photobooth Sign


Well hello! I almost forgot to share with you this sign makeover (okay, we should call it a MAKEUNDER) that I did for local photographer Erin. She had already hired Lather Creations to remake a bench a while back and was looking for a sign to use at weddings for her photobooth so guests would know what it was. This was my kind of challenge!

I had originally planned to use a vintage frame and build a piece inside for the sign but after some trial and error, I decided to repaint an existing sign with all the hanging hardware and structure in place. I went a thrifting and you won't believe what I dug out of the pile...I looked pretty silly buying it in the middle of July. Never mind buying it at all!


Pretty special eh? Hopefully someone got some good holiday cheer from this snazzy decoration. I was ready to take it in a WHOLE new direction!  After some serious priming (don't skip this step kids) to cover up the past discretions...I painted the entire sign a pale linen cream, then used a brownish-grey to fill in the hand-drawn lettering. I don't care to use black, it's just too stark. Some vintage photo tabs on the edges frames the sign.

How's that for Extreme Makeover: Sign Edition??


Another great thrifted item saved from the landfill and made to be beautiful again! Have a lovely evening friends!

06 July 2011

Before and After: Luxe Blooms Cherry Bench

Hello! Long time no talk Before & After! I've been so wrapped up in busy summer life that Lather Creations has been on the back burner. But I have been plugging away at a few commissions here and there. Like this simple bench...

Local PR gal Michelle contacted me to see if I had any benches in stock for her entranceway. Luckily, I just happened to have this vintage cherry wood piece with long and lean legs that I handpicked for Lather during a thrifting hunt earlier in the year. *Michelle is a repeat customer and I have to say - it warms my heart when someone loves their Lather Creation enough to come back for more!

Michelle picked out the most luxurious velvet flocked fabric in rich jewel tones of rasberry and violet, against a modern grey linen background. She chose to keep the original cherry base, it was a great match to the fabric and the few knicks and dents adds a bit of vintage personality to the look. Isn't it striking?

I just love how it turned out, so regal and chic! Michelle promised to send pics of the bench in her new space and I can't wait to see!

Have a lovely Wednesday friends!

By the way - are we Twitter friends yet? If not, we should be - it's such a fun way to chat throughout the day.  Follow me here!

30 May 2011

Before and After: Milky Grey Tea Time Tray


Okay, it's officially been forever since I've shown you any before and afters (okay not forever but you know what I mean)...and this is a teeny one to boot! But what can I say - you truly can't do it all! Every time I take something new on, something else has to give.  I have all these guilts - like 'didn't I tell them I was opening an Etsy shop?', or 'when was the last time I finished a Lather Creation??' But I'm focused on getting healthy, planning a wedding, keeping up with my blog and enjoying my summer. I'll just have to forgive myself for what doesn't come quickly. Are you able to forgive yourself for not doing it all? Jealous.

Enough with the deep thoughts, remember when I showed you my Grade 9 shop class wooden tray? Well my lovely mama kept it all these years and uses it daily for her pots of tea. Here's my dated 1991 version of the tray...


And here's the refreshed 2011 version!


I started by painting it with a paint/primer combo - Aura by Benjamin Moore in a soft dove grey mistint. Then using a ruler and a pencil, I measured the section where I wanted my words. I roughly marked out guides to stay within and drew the outline for the letters. Then using a tiny art paintbrush, I filled in the letters from a tester size of Martha Stewart's Seal (a dark brownish grey). I coated the tray with a couple of coats of poly for durability. I'm keeping my fingers crossed it withstands my mom's strict daily schedule of hot pots...time will tell!


I love the instant gratification of painting something small! You could do this to anything - a jewellery box, a knife block, book ends...I'm always hunting around the small wooden items section at the thrift stores. I'm in the middle of painting old frames for props for my wedding photo booth - can't wait to show you!

How's your Monday going so far friends?